
使用GitHub Actions操作进行Hexo托管在GitHub上面的博客自动化部署。
GitHub Actions
Github的自动化测试/部署工作流。
配置流程
使用Github Actions进行自动化部署,需要进行以下几步骤:
1.获取ssh密钥
本地电脑生成ssh密钥(公、私)。
1
| ssh-keygen -t rsa -b 4096 -f ~/.ssh/github-actions-deploy
|
私钥:
1
| ~/.ssh/github-actions-deploy/xxx
|
公钥:
1
| ~/.ssh/github-actions-deploy/xxx.pub
|
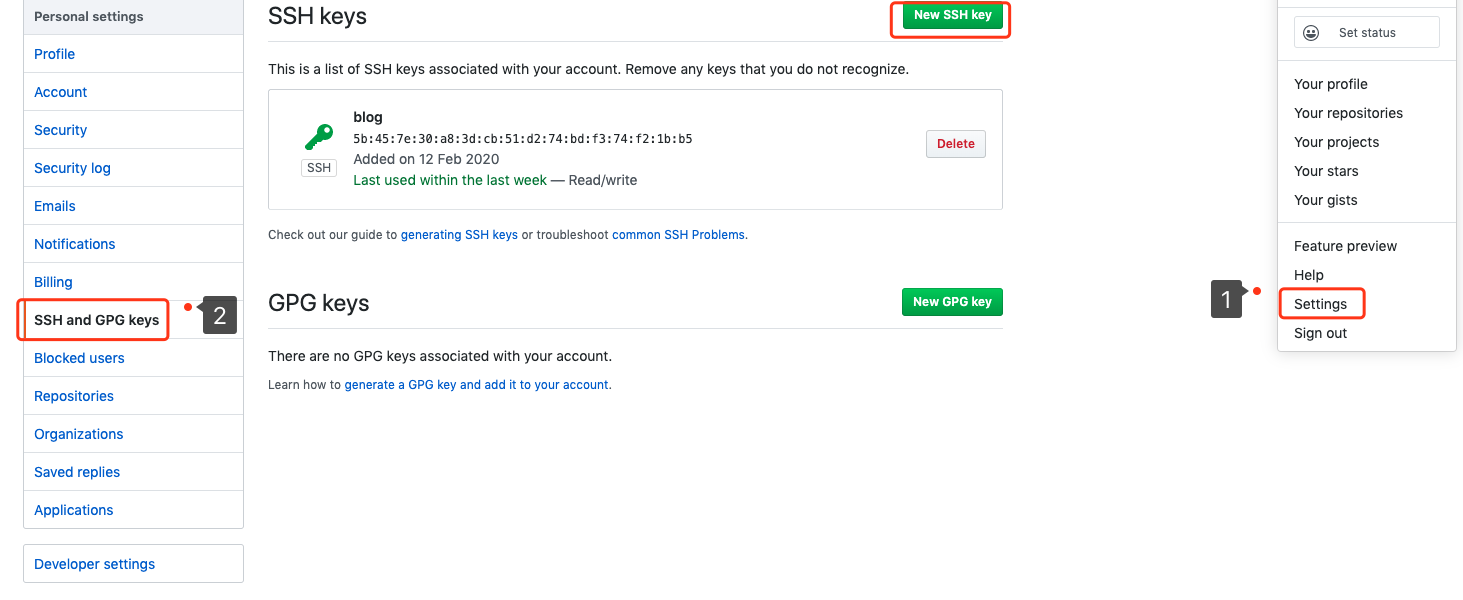
2.配置GitHub
在Github的个人设置里面,设置SSH公钥。命名随意。
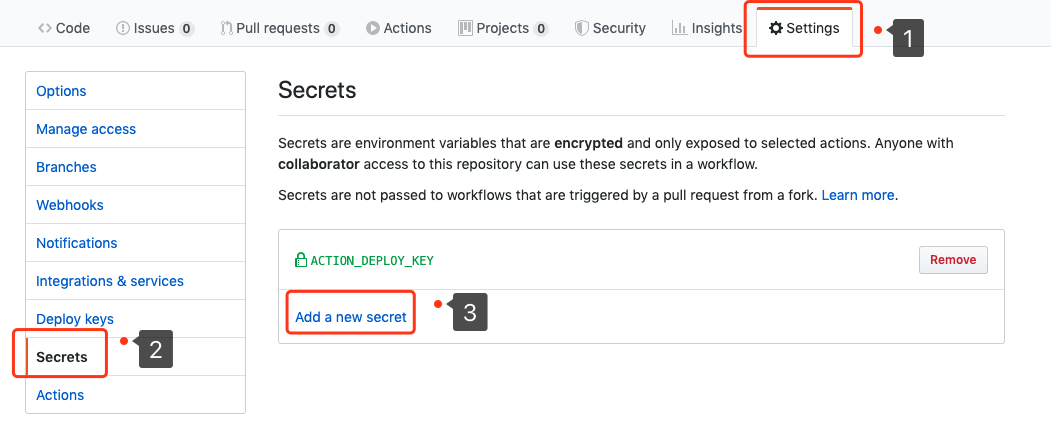
3.配置仓库
在需要持续化集成的仓库设置里面,设置SSH私钥,命名ACTION_DEPLOY_KEY.(脚本中会用到)
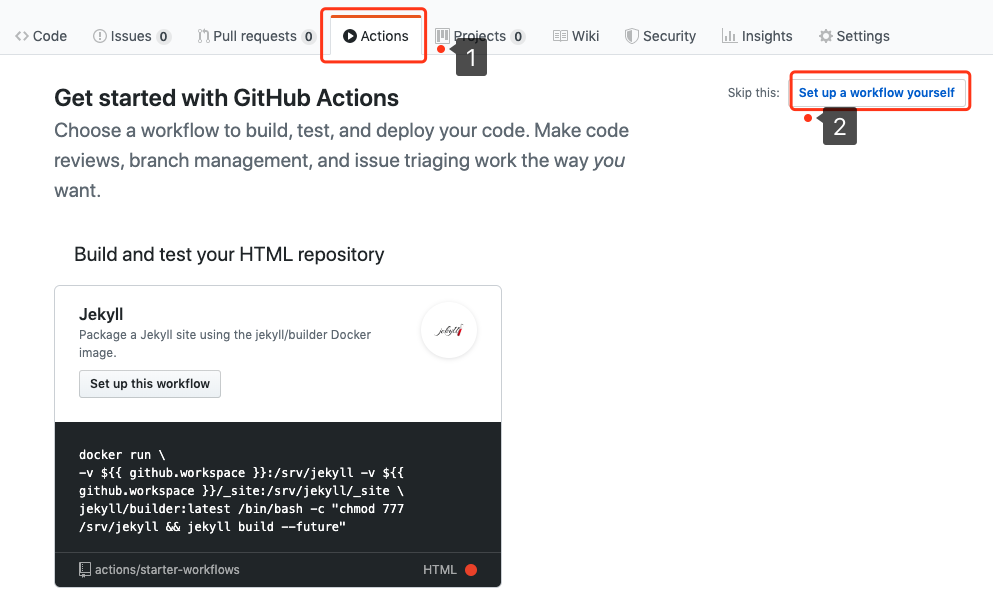
4.配置工作流脚本
进入需要配置的仓库,进入Actions里面,新建workflow文件。
脚本:
1
2
3
4
5
6
7
8
9
10
11
12
13
14
15
16
17
18
19
20
21
22
23
24
25
26
27
28
29
30
31
32
33
34
35
36
37
38
39
40
41
42
| name: Deploy Blog
on: [push]
jobs:
build:
runs-on: ubuntu-latest
steps:
- name: Checkout
uses: actions/checkout@v1
- name: Use Node.js 10.x
uses: actions/setup-node@v1
with:
node-version: "10.x"
- name: Setup Hexo env
env:
ACTION_DEPLOY_KEY: ${{ secrets.ACTION_DEPLOY_KEY }}
run: |
mkdir -p ~/.ssh/
echo "$ACTION_DEPLOY_KEY" | tr -d '\r' > ~/.ssh/id_rsa
chmod 600 ~/.ssh/id_rsa
ssh-keyscan github.com >> ~/.ssh/known_hosts
git config --global user.name 'github-user-name'
git config --global user.email 'github-email@xxx.com'
npm i -g hexo-cli
npm i
- name: install plugin
run: |
npm install hexo-deployer-git --save
npm install hexo-generator-search --save
npm install hexo-generator-feed --save
- name: Deploy
run: |
hexo g -d
|
5.Hexo配置
上面是根据SSH来实现,在Hexo的配置文件_config.yml 中需要进行相关的配置。
需要选择SSH模式!
1
2
3
4
| deploy:
type: git
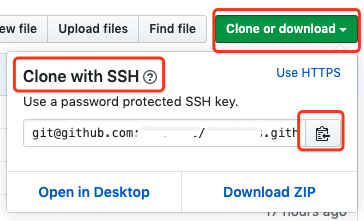
repo: 上面拷贝的信息(git@github.com:xxx)
branch: master
|
其他选择
之前是基于AppVeyor进行的持续集成:AppVeyor持续集成配置